Hardware
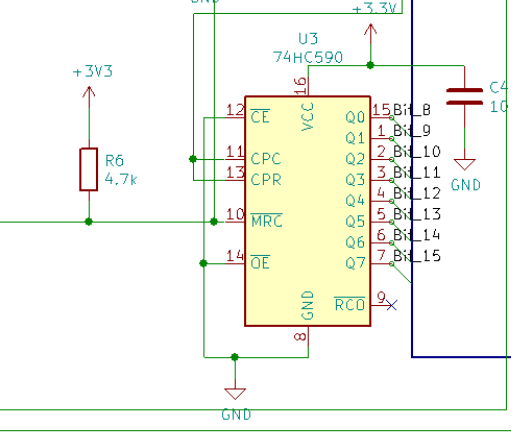
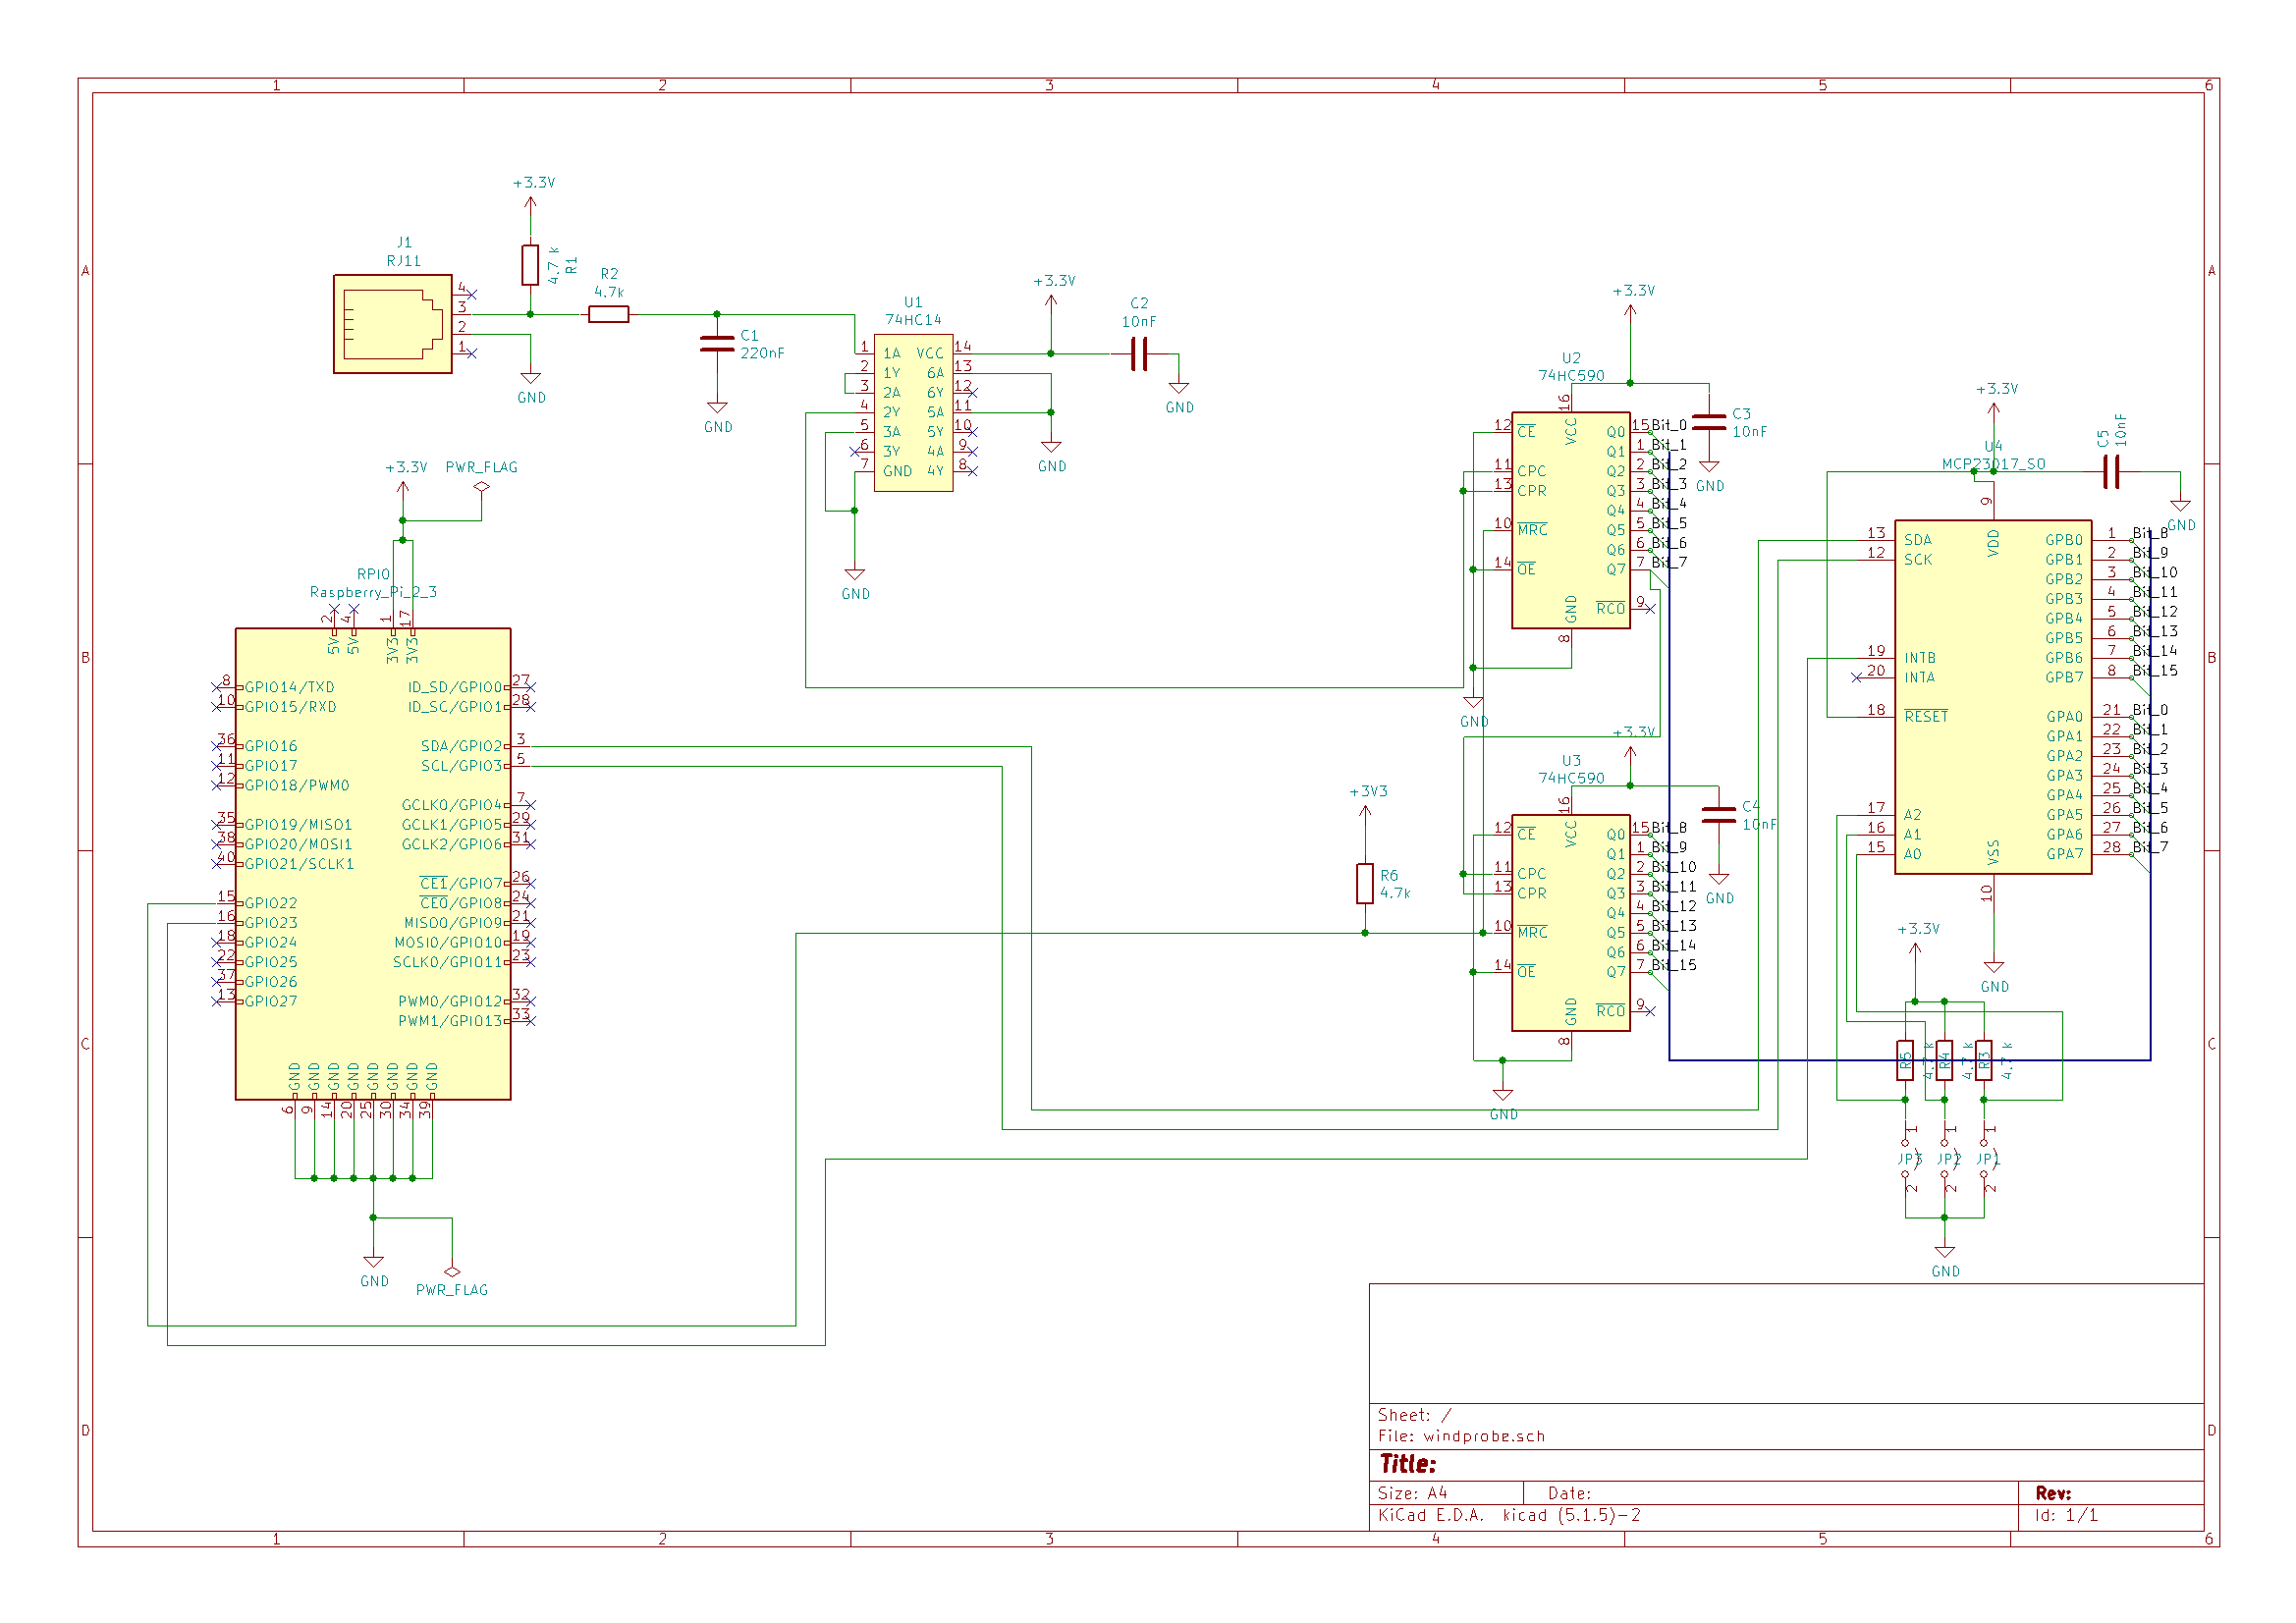
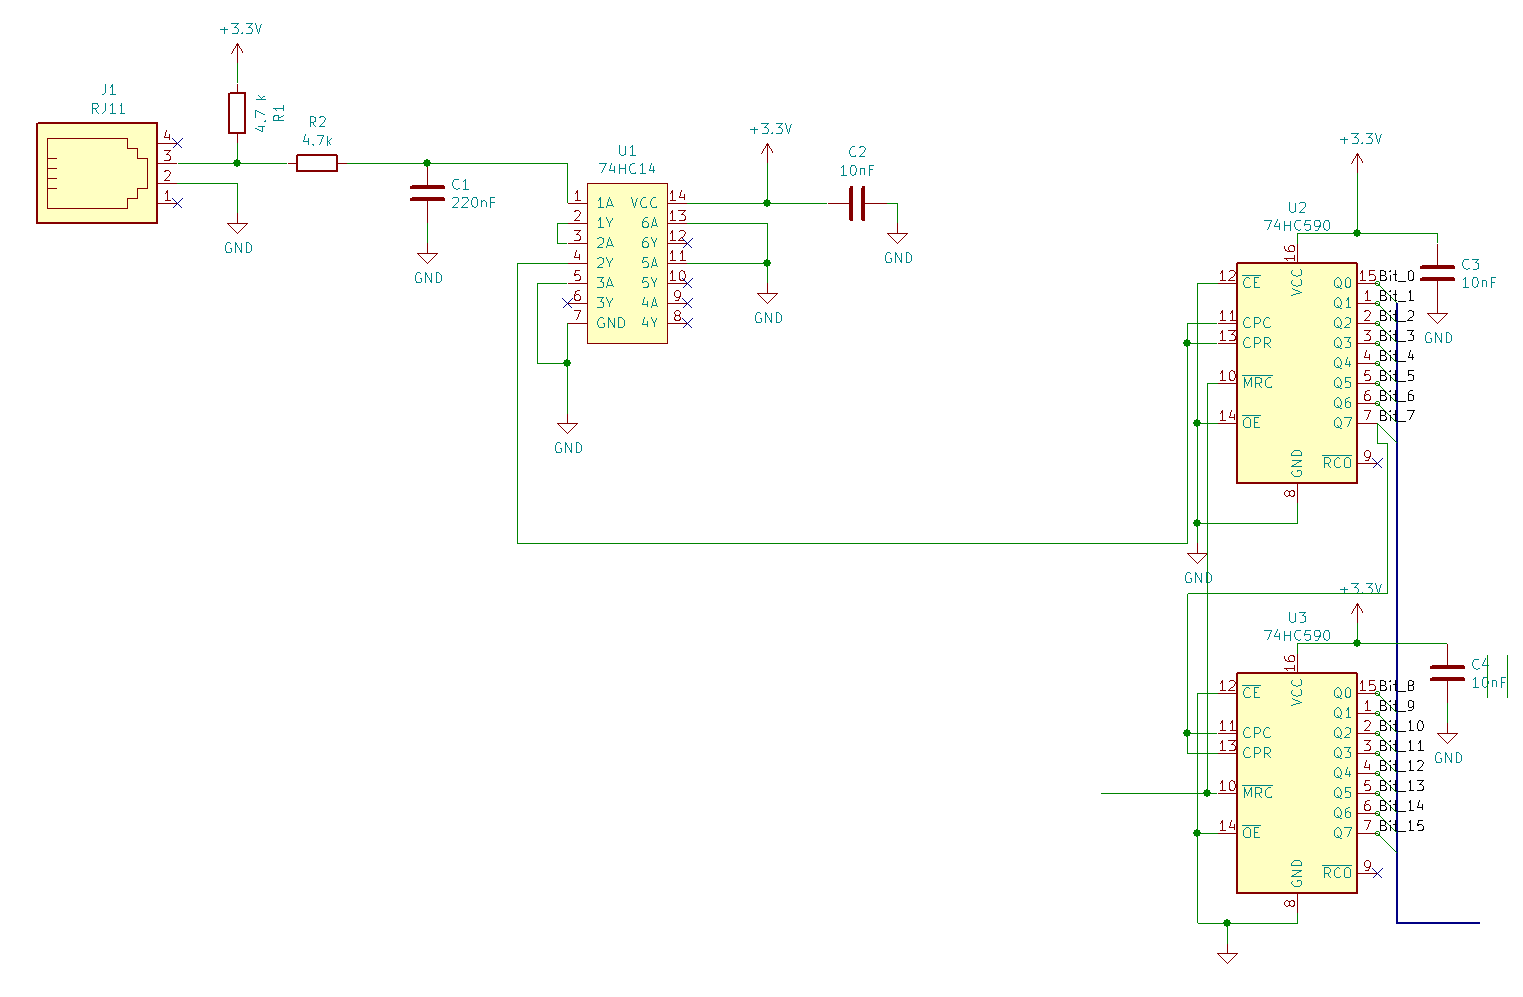
This post summarises 2 sessions. We added a pull-up Resistor between the Raspberry and the probes counter reset line to remove uncertain behaviour in case the raspberry is booting up or is unconnected. You can get rid of the uncertain behaviour by just resetting the MCP and the counters but practices helps remembering :).
Further we found out, that the windprobe we ordered sends a pulse every 1/2 turn and not as anticipated once per turn. This we will need to keep in mind for the counting and to make sure our filter is not cutting off the maximum windspeed we were aiming for.
Brice introduced us to the basics of a bus. These limitations have to be kept in mind because there is signal bouncing happening in the bus. (Think of it kind of like water ripples if you build a physical water channel model of the bus and produce ripples on one end. The ripples bounce of the ends and bounce back to the producer, creating noise.)
- The bus needs pull-up Resistors at the end of the line.
- A bus can never be a star configuration (https://en.wikipedia.org/wiki/Star_network)
- All devices on the bus have to physically come one after another on the bus.
- The connection between the device and the bus should be as short as possible.
Software
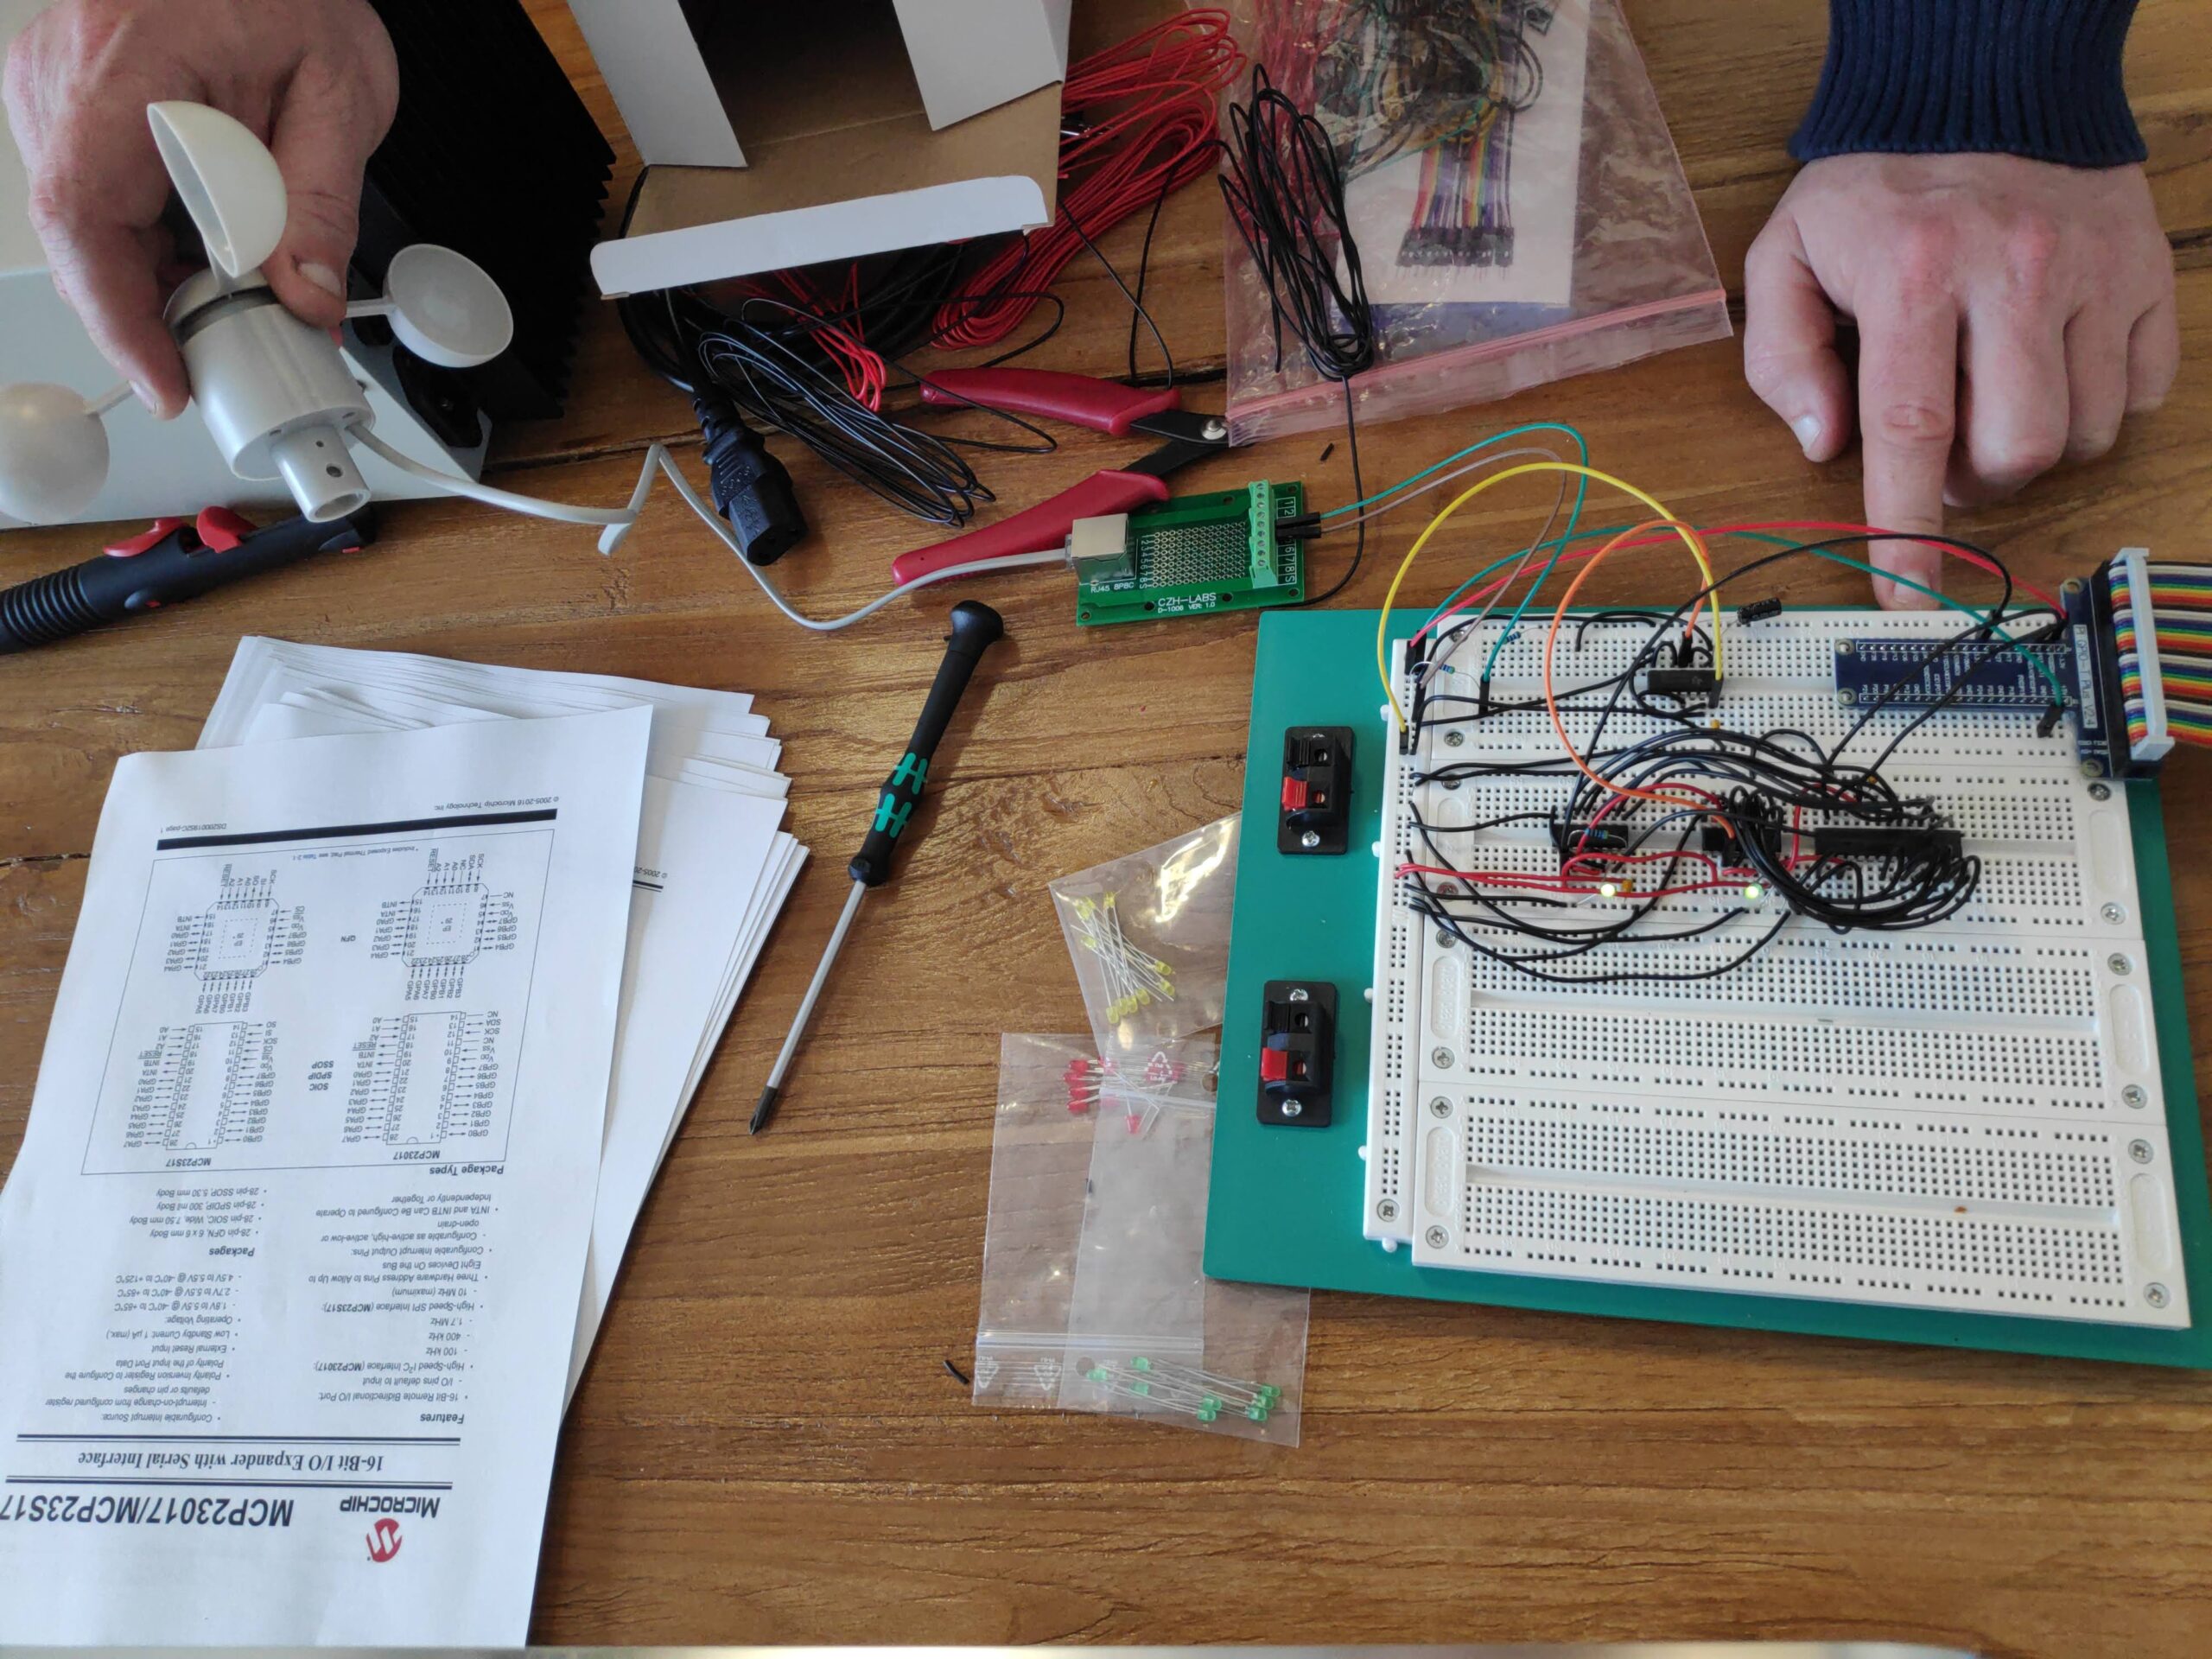
Our setup now is a wifi router connected to the internet, the raspberry connected via lan to the router and a laptop connected to the router aswell. We found the IP address of the raspberry on the router and connected to the raspberry via ssh (we use putty to connect (192.168.1.159:22 for us)).
To configure the raspberry to work via ssh check this raspberry manual page: https://www.raspberrypi.org/documentation/remote-access/ssh/ (Enable SSH on a headless Raspberry Pi (add file to SD card on another machine)). Once we logged in on the raspberry we run 2 commands.
- sudo apt update
- sudo apt install i2c-tools
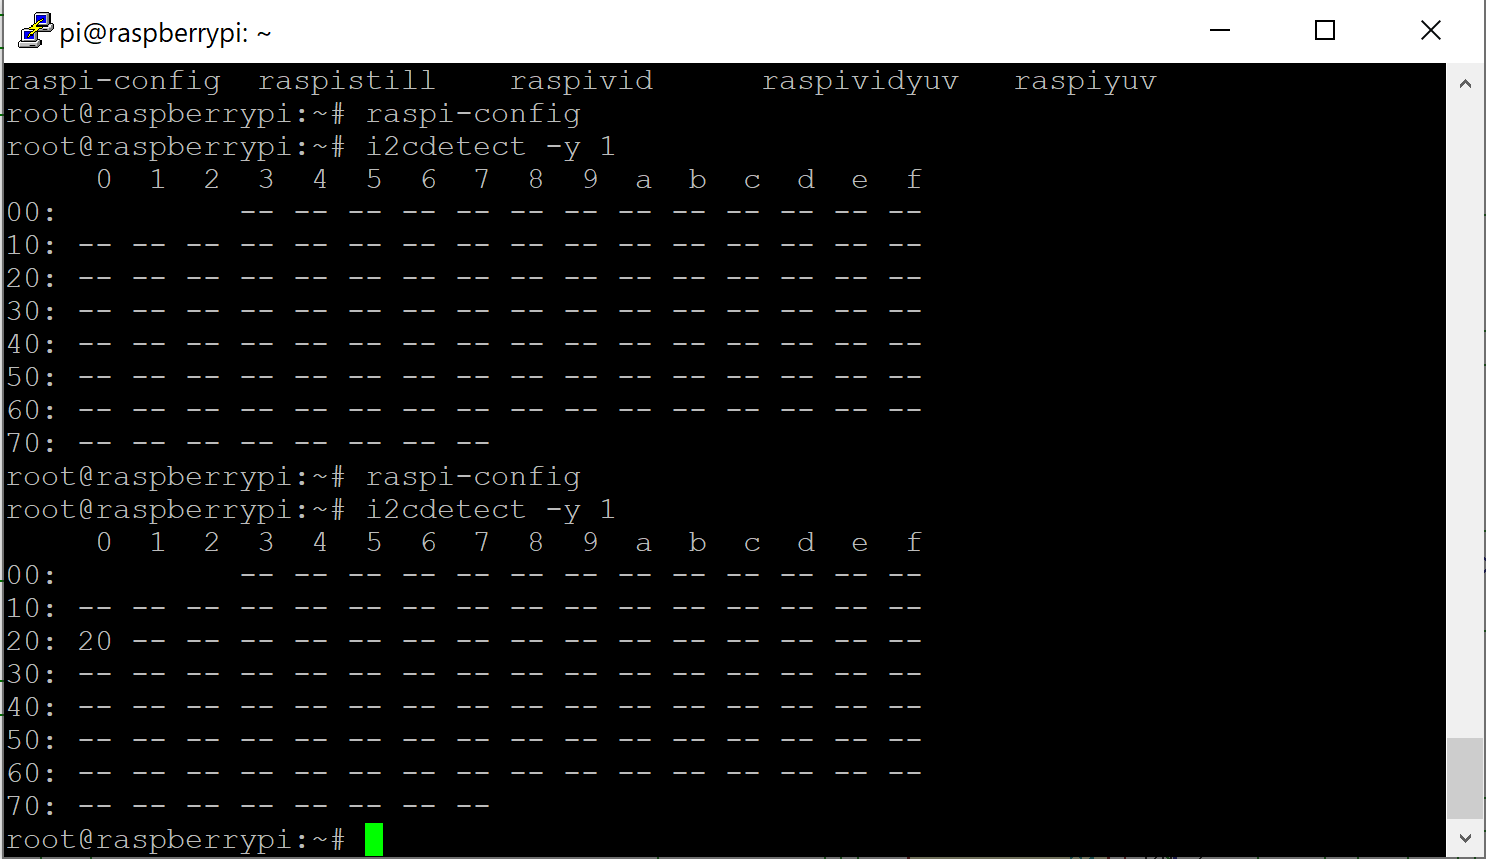
After that we have to enable i2cdetect to finally be able to read from our bus. To configure we write “raspi-config” navigate to 5 (Interface) and then I2C enable.
Now everything is set to check our bus. As you can see we have our device (here as 20) on the bus address 0x20 (column 0, row 20). The device is 20 because we configured the hardware pins to be 000 by grounding all 3 of them. The 4 predefined Bits are 0100. This means our Device is Binary 0b01000000 which in Hex is 0x20.

After a light reading in the manual we found how to read the bits. To program the MCP we will have to do a deep dive into the MCP datasheet ( http://ww1.microchip.com/downloads/en/devicedoc/20001952c.pdf) to check if everything works we just use the raspberry with the command “i2cget -y 1 0x20 0x12” and “i2cget -y 1 0x20 0x13“. See the i2c manual here ( https://www.waveshare.com/wiki/Raspberry_Pi_Tutorial_Series:_I2C and here https://linux.die.net/man/8/i2cget)
- i2cget: read bytes
- -y: Disable interactive mode
- 1: Indicates the number or name of the I2C bus to be scanned.
- 0x20: Address of the MCP I/O extension
- 0x12: Addres in the MCP to read the first 8 bits, see next screenshot
- 0x13: Addres in the MCP to read second 8 bits, see next screenshot
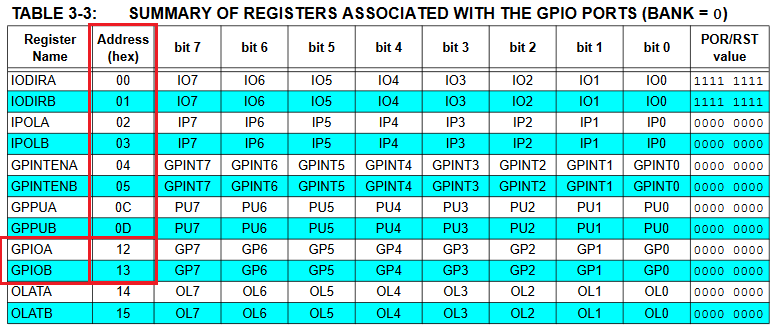
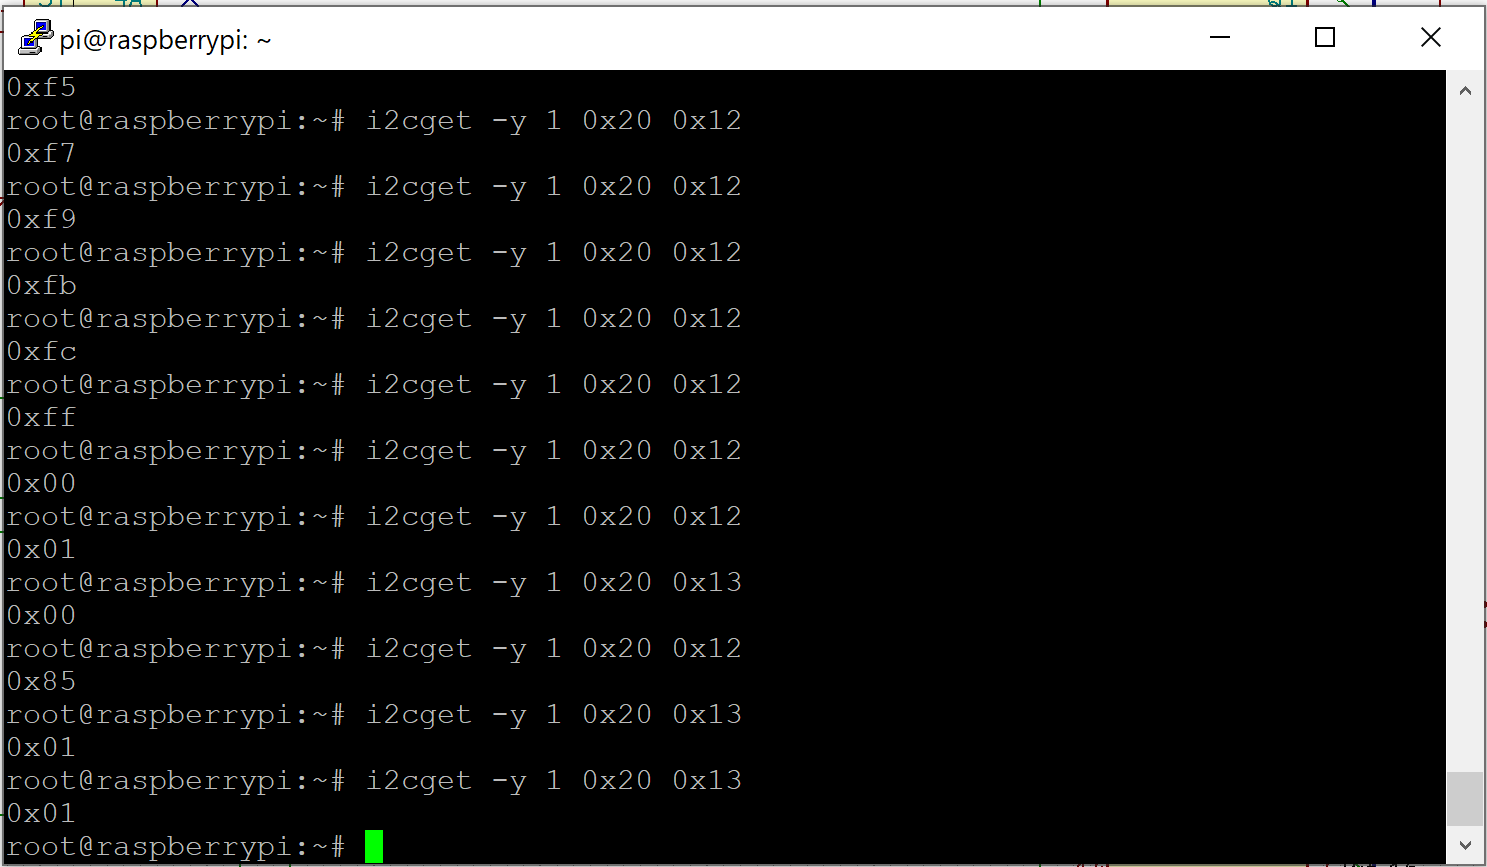
As you can see by turning the probe and reading the registers the number is increasing. Once we pass 0xFF it is reset to 0 and we can read on the second Bit bank.
Github Link: https://github.com/TheCell/Weatherstation
This game is a best played with a friend. I had a lot of fun just watching the animations. The game is lighthearted and easy to play, but the story has some heavy moments where the game turns sad. It is a good mix of joyfulness and sadness. Honkers is always there to pet and to take a break from what you do.
As usual a selection of screenshots can be found on imgur and the full set of screenshots can be found in my steam library: https://steamcommunity.com/id/Thecell/screenshots/?appid=592480&sort=oldestfirst&browsefilter=myfiles&view=imagewall
The game can be found on Steam or on GOG.
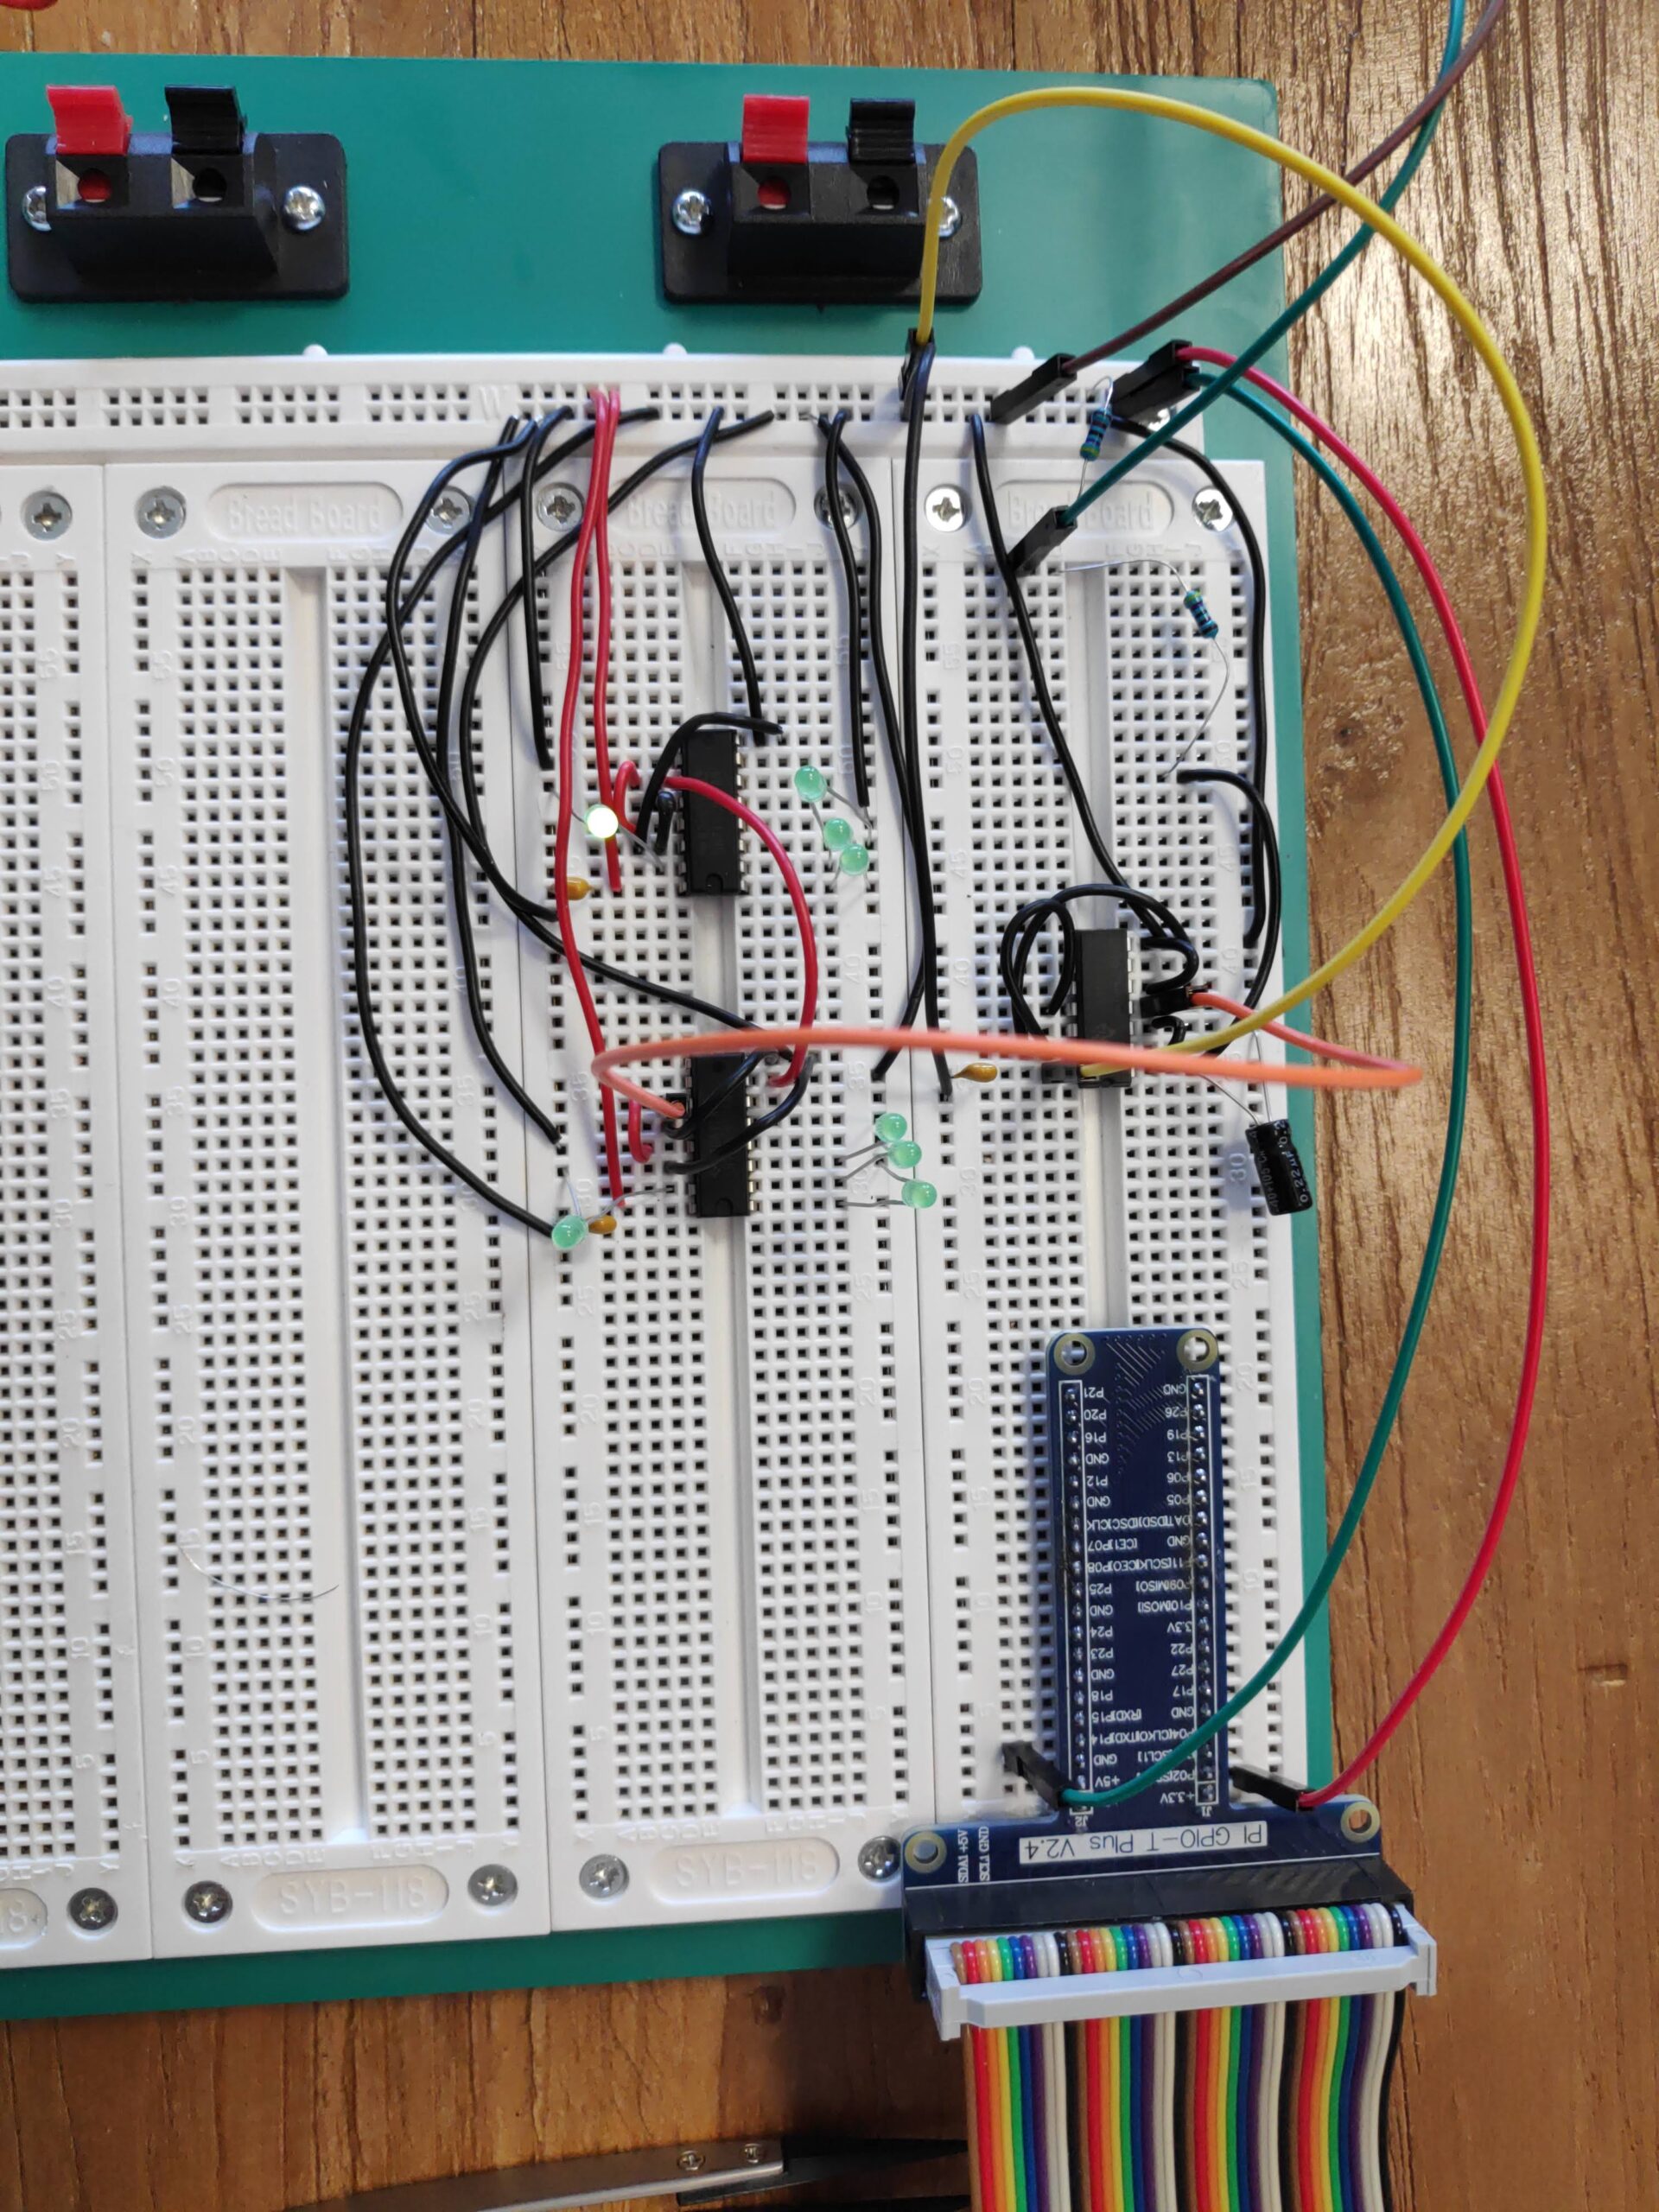
We continued verifying our current design and implemented the next part of the schema: The counter. We verified the counters by plugging LEDs in the according bits and looked if it’s counting correctly. In the video we cheated the second counter by plugging the input on another bit of the first counter, so we don’t have to rotate the sensor fan forever. For the counters we didn’t have to change the schematics we planned.
The tiny capacitors and filters
Prepare for a unsitific and kind of educated guess part below. Don’t take this for the truth without doing your own research on this:
We did not really explain why there are tiny 10nF capacitors at the power entrance of passive elements. And I’ll have a word about high and low-pass filters. The 10nF capacitors are called decoupling capacitors and they must be unpolarized to work. The tiny capacitors are multipurpose. One purpose is that the decoupling capacitors add fast “charge storage” near the IC. Additionally the decoupling capacitors and the pass-filters act as a kind of “lightning rod” to get rid of high or low frequency noise in the power. This is because capacitors can be seen as a short-circuit when super high or very low frequencies are applied. Take a look at Wikipedia for a more scientific explanation on this: https://en.wikipedia.org/wiki/Decoupling_capacitor
Besides this we started setting up a private WLAN and started configuring the Raspberry. More on the Raspberry at a later point.
Github Link: https://github.com/TheCell/Weatherstation
Hello everyone. It’s been a while and Christmas, holidays and people having time off comes to a conclusion. This post is all about getting our hands on the ordered material and testing parts of our circuit for the first time. We already found an error in our schema with how the windprobe is included. I changed it to reflect our corrected test setup. The additional resistor (R2) is needed to not short out the Capacitor from the filtering stage every time the probe closes the circuit.
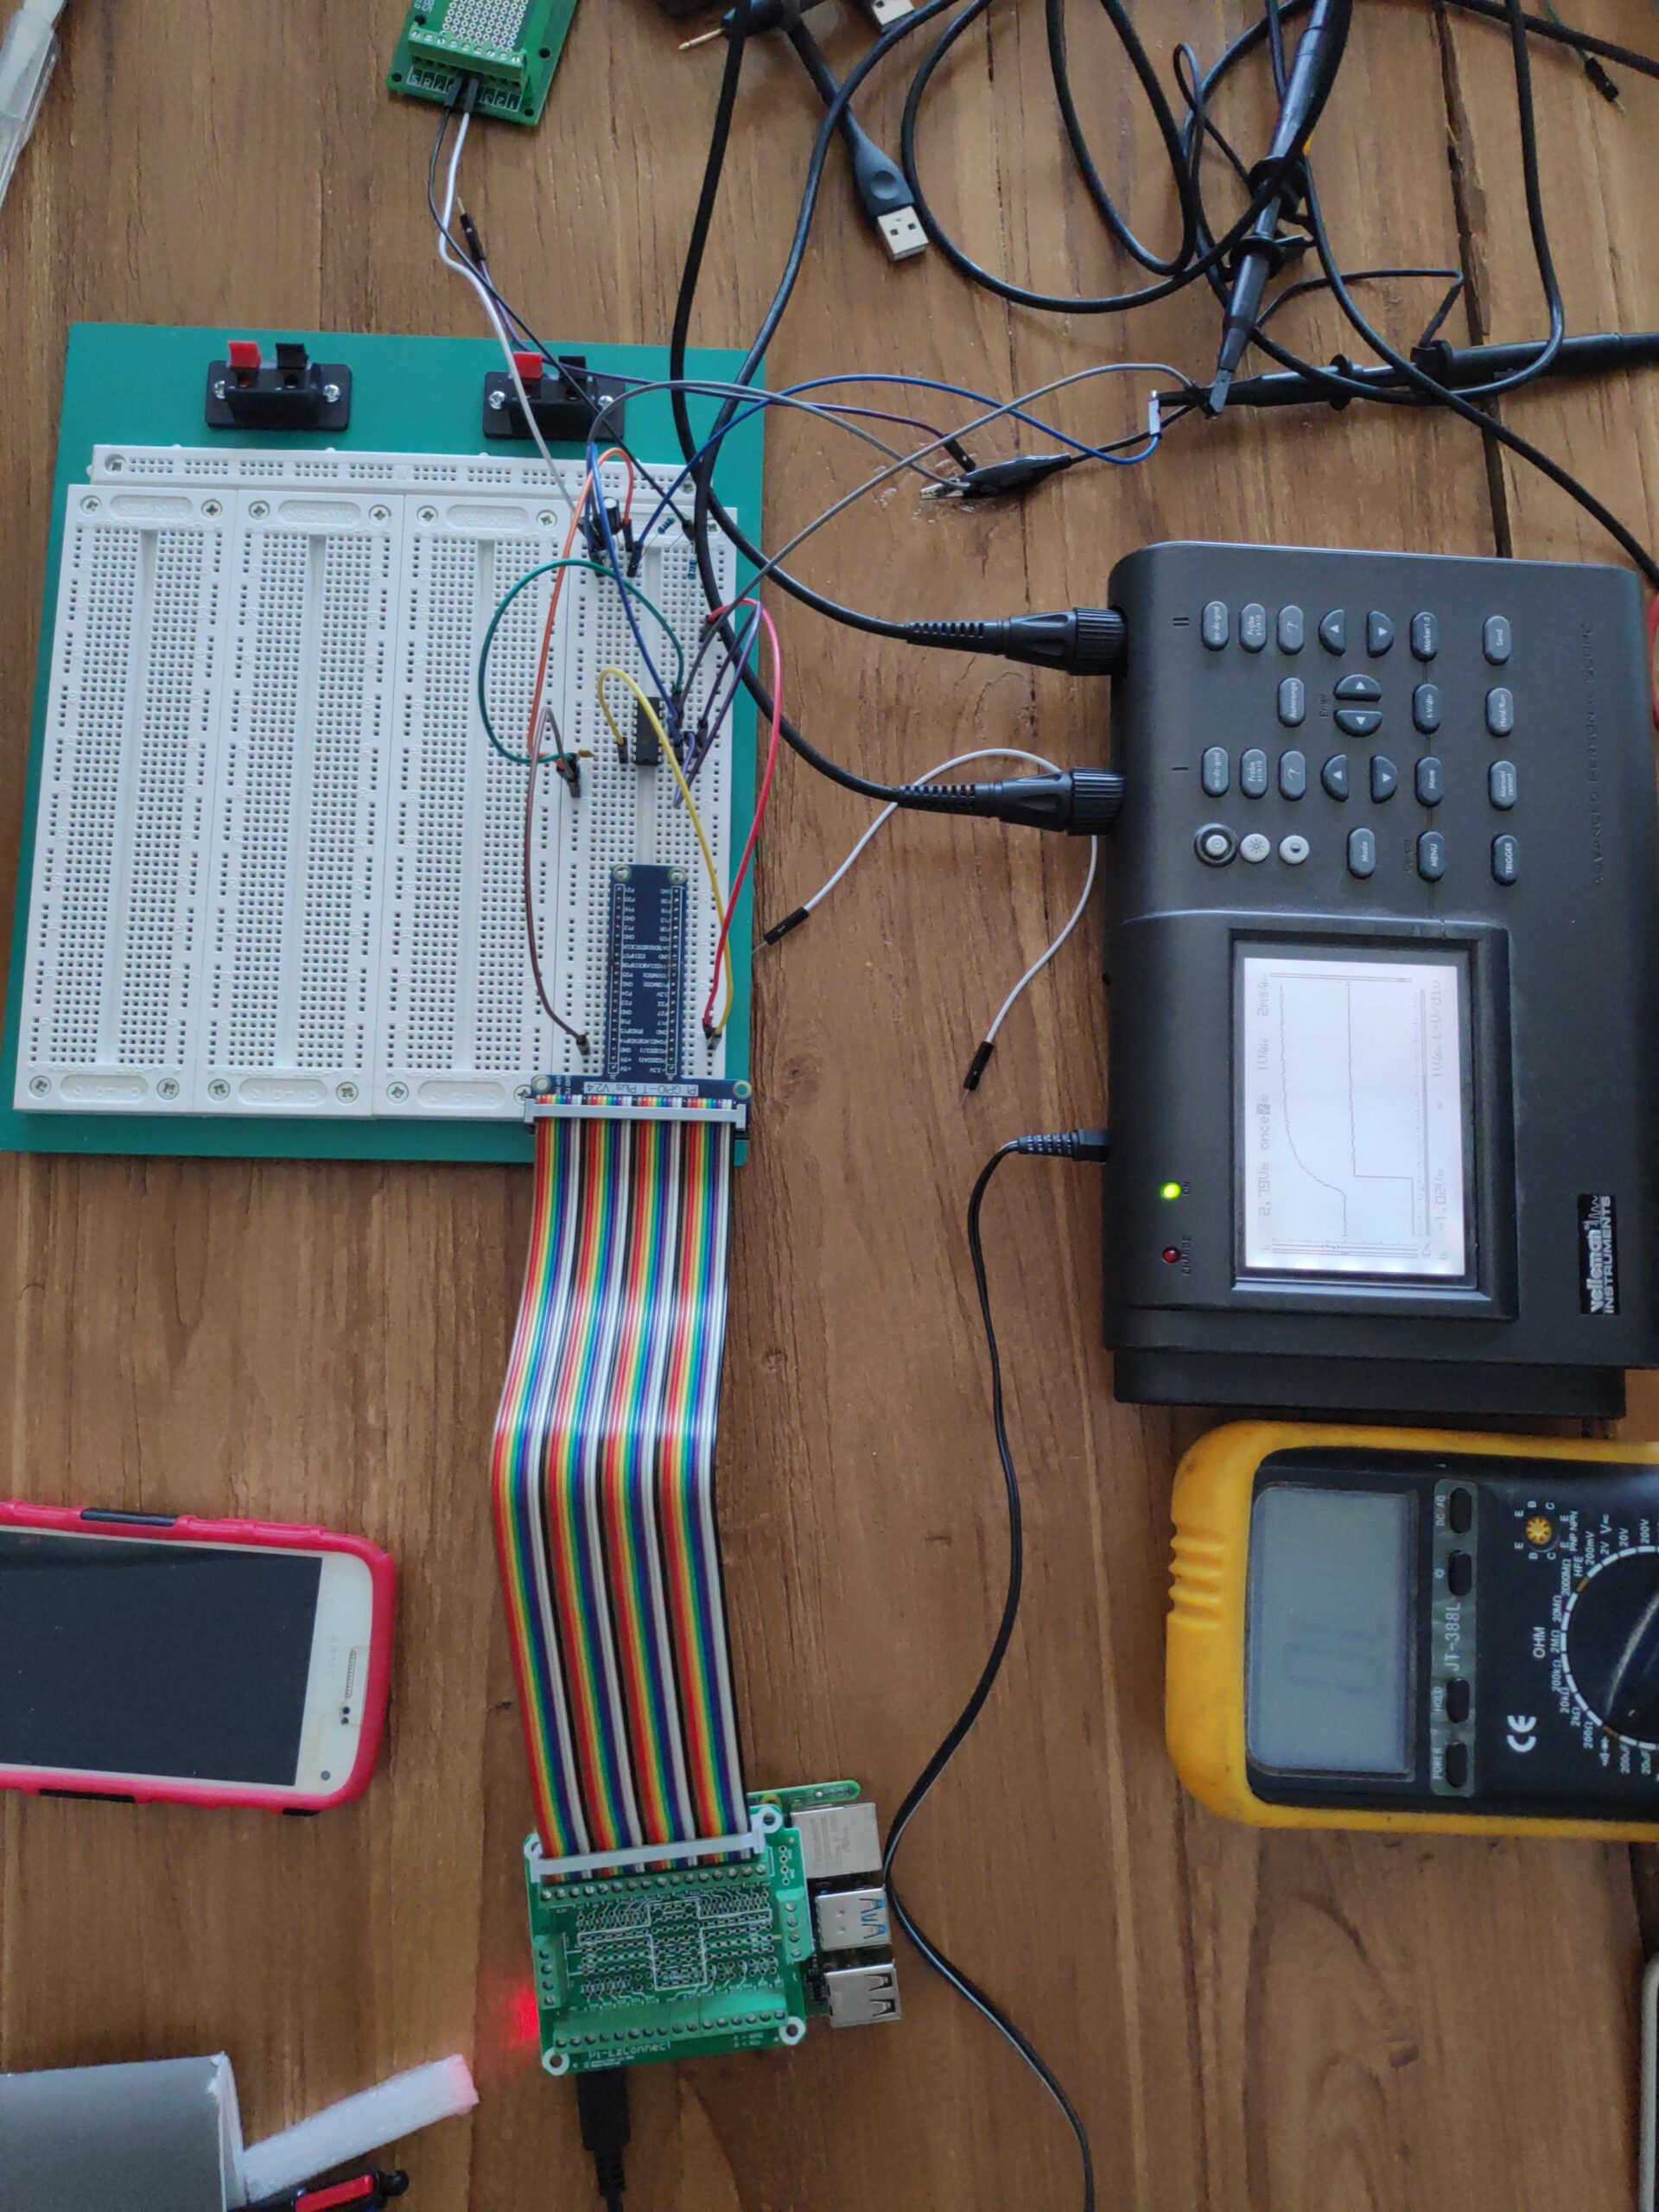
For the testing we started with the Resistor Capacitor (RC) Low-pass filtering and once that was confirmed we added the Schmitt-Trigger and measured that. The following diagram shows where the Probes were connected in the setup.
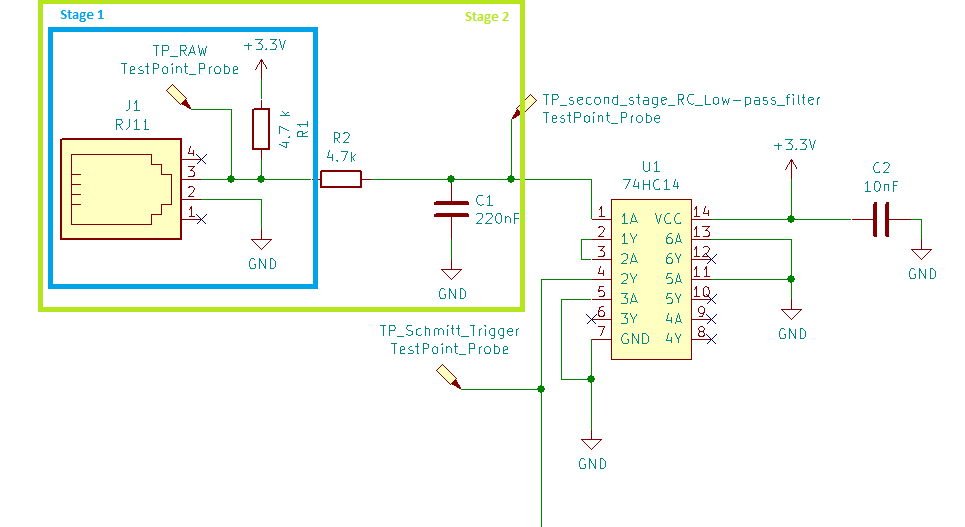
The rest of this blog will just comment our findings and show the oscillator measures.
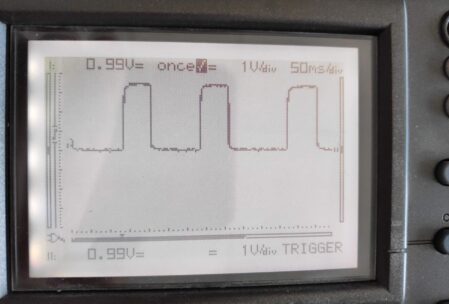
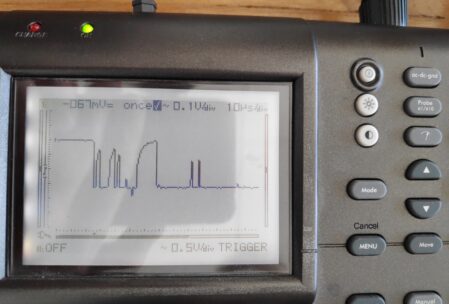
Here we can see a zoom in on the raw input. When the probe is closed the circuit is grounded resulting in a tension fall off. What we can see here is, that the voltage drops but has some noise before it finally reaches zero. In fact with this signal we would already count ~7 rotations instead of 1.
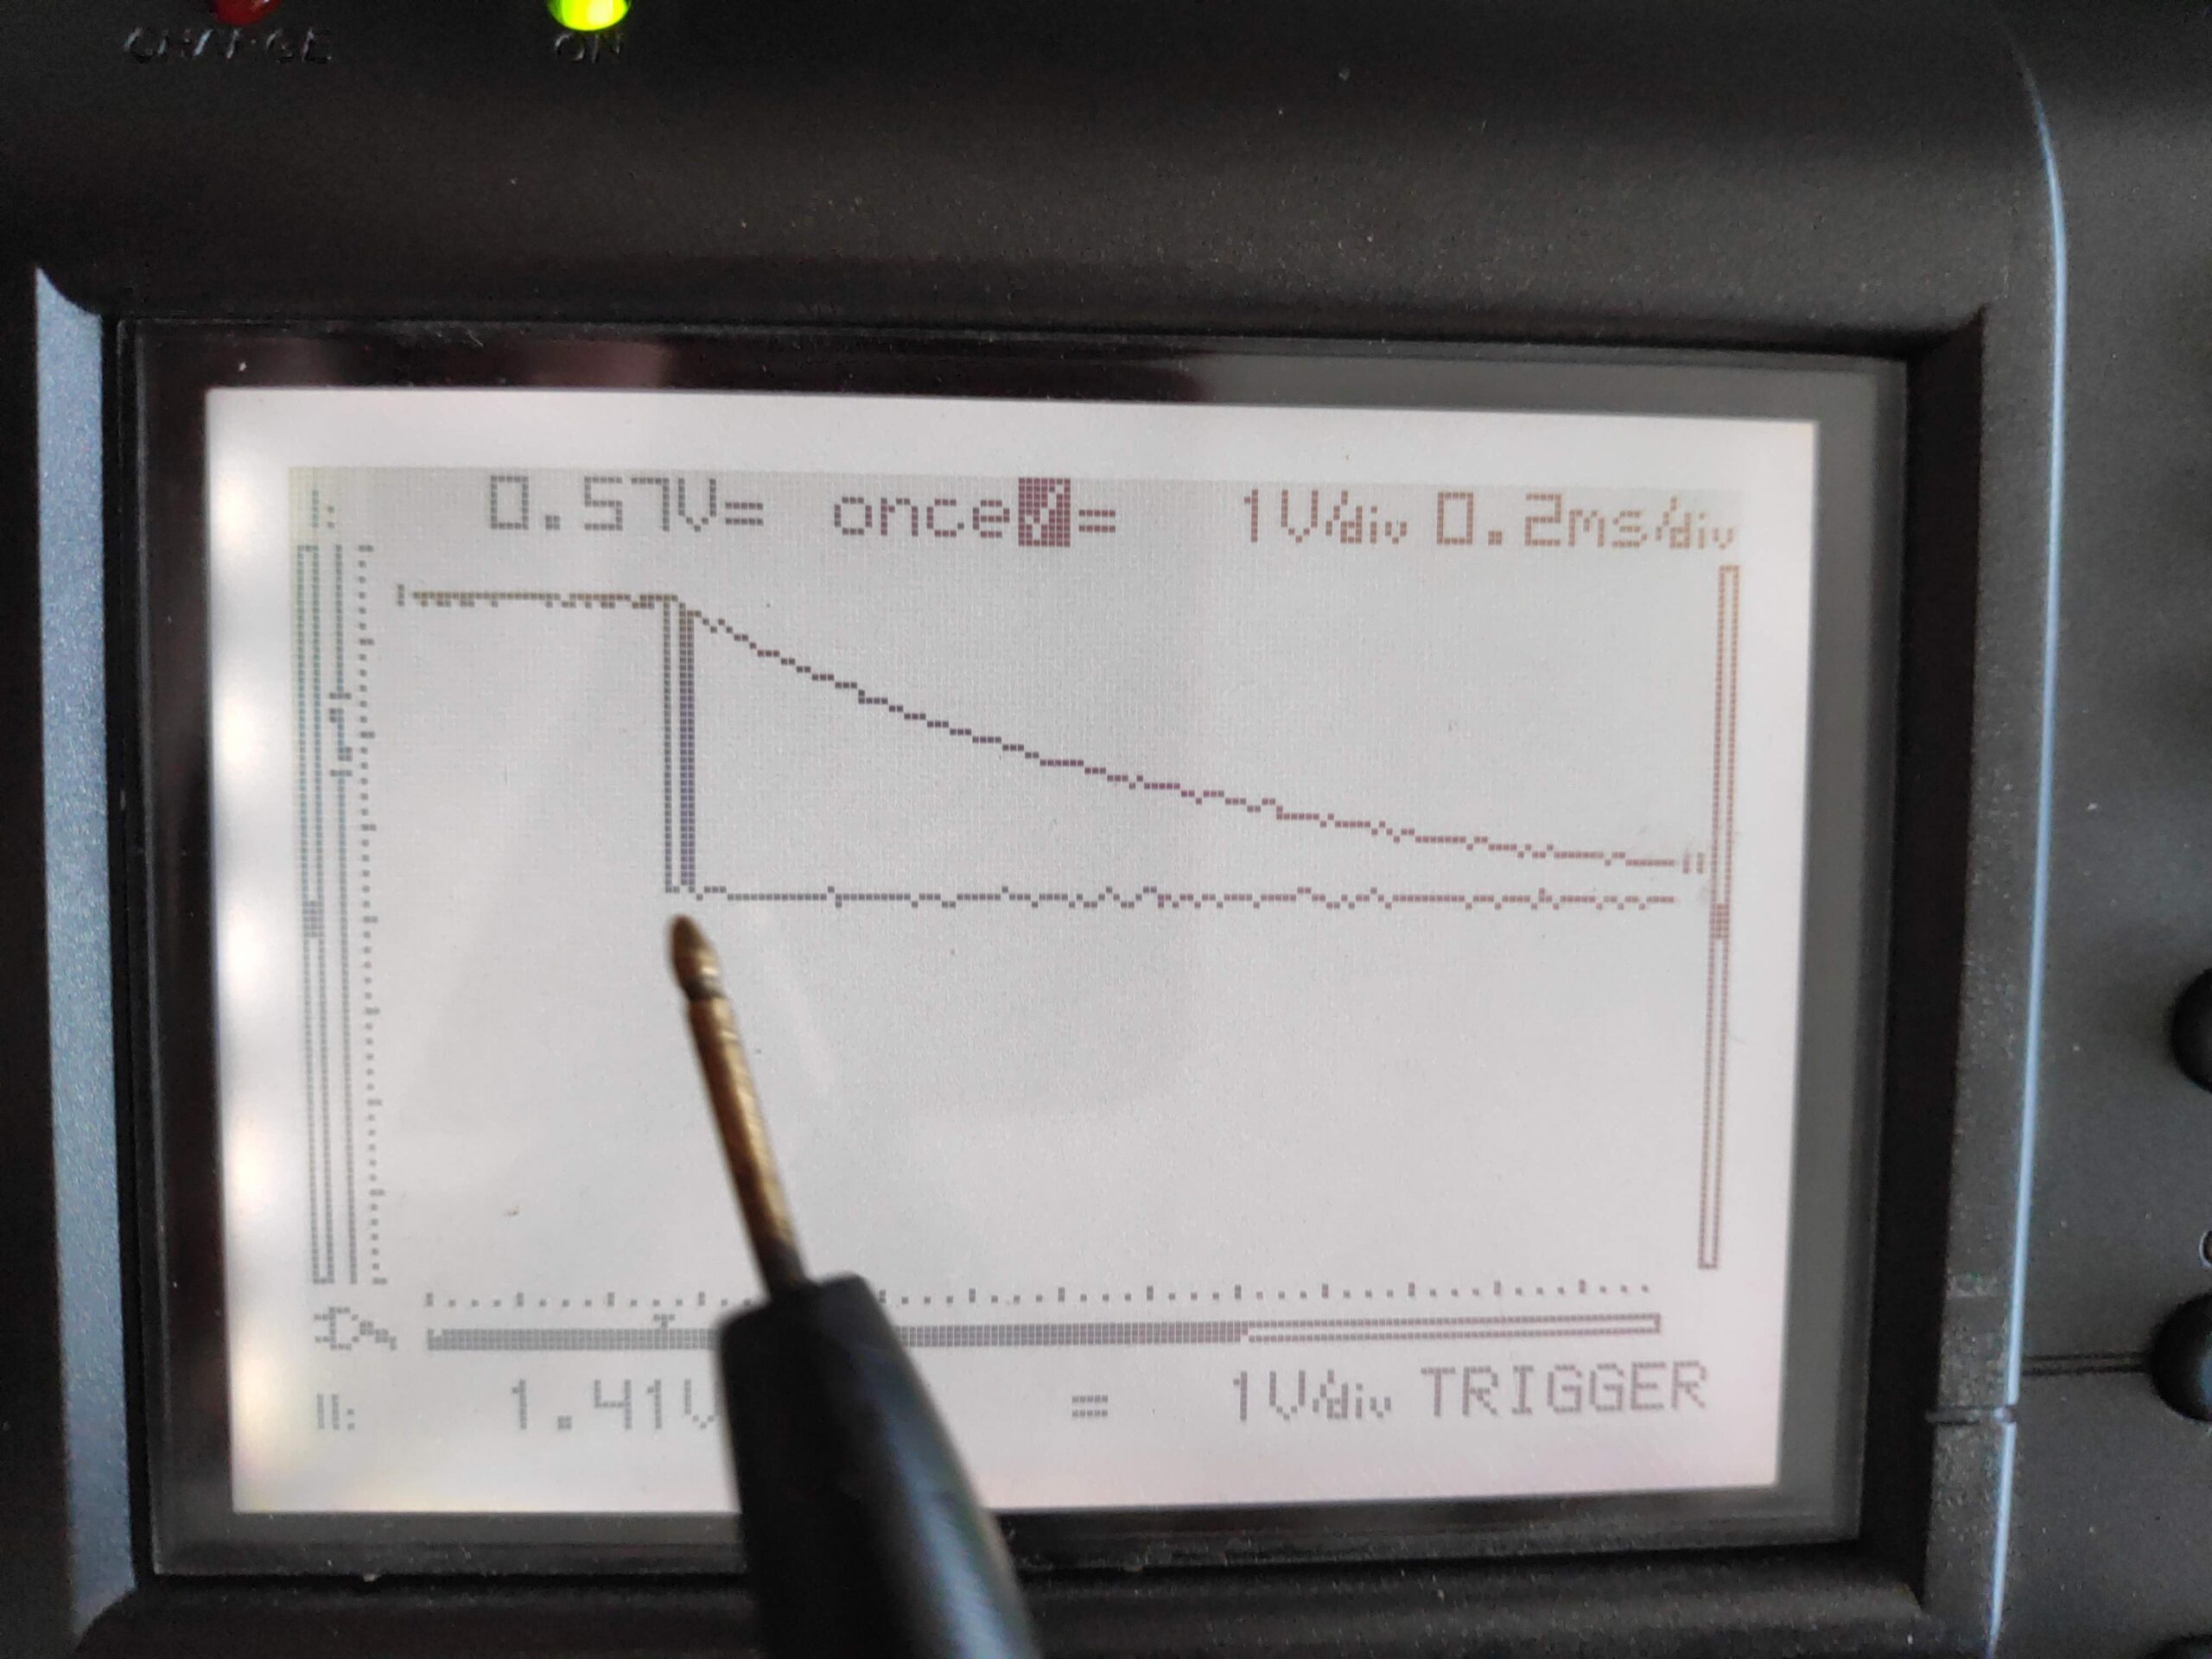
Here you can see 2 probe measures on top of each other. The falling edge as RAW has some noise and the measure after the Second Stage RC Low-pass filter stage (the capacitor) which is gradually lowering the voltage without much noise. That’s a good sign already but we want a sharp and certain off to have multiple counts during the transition period.
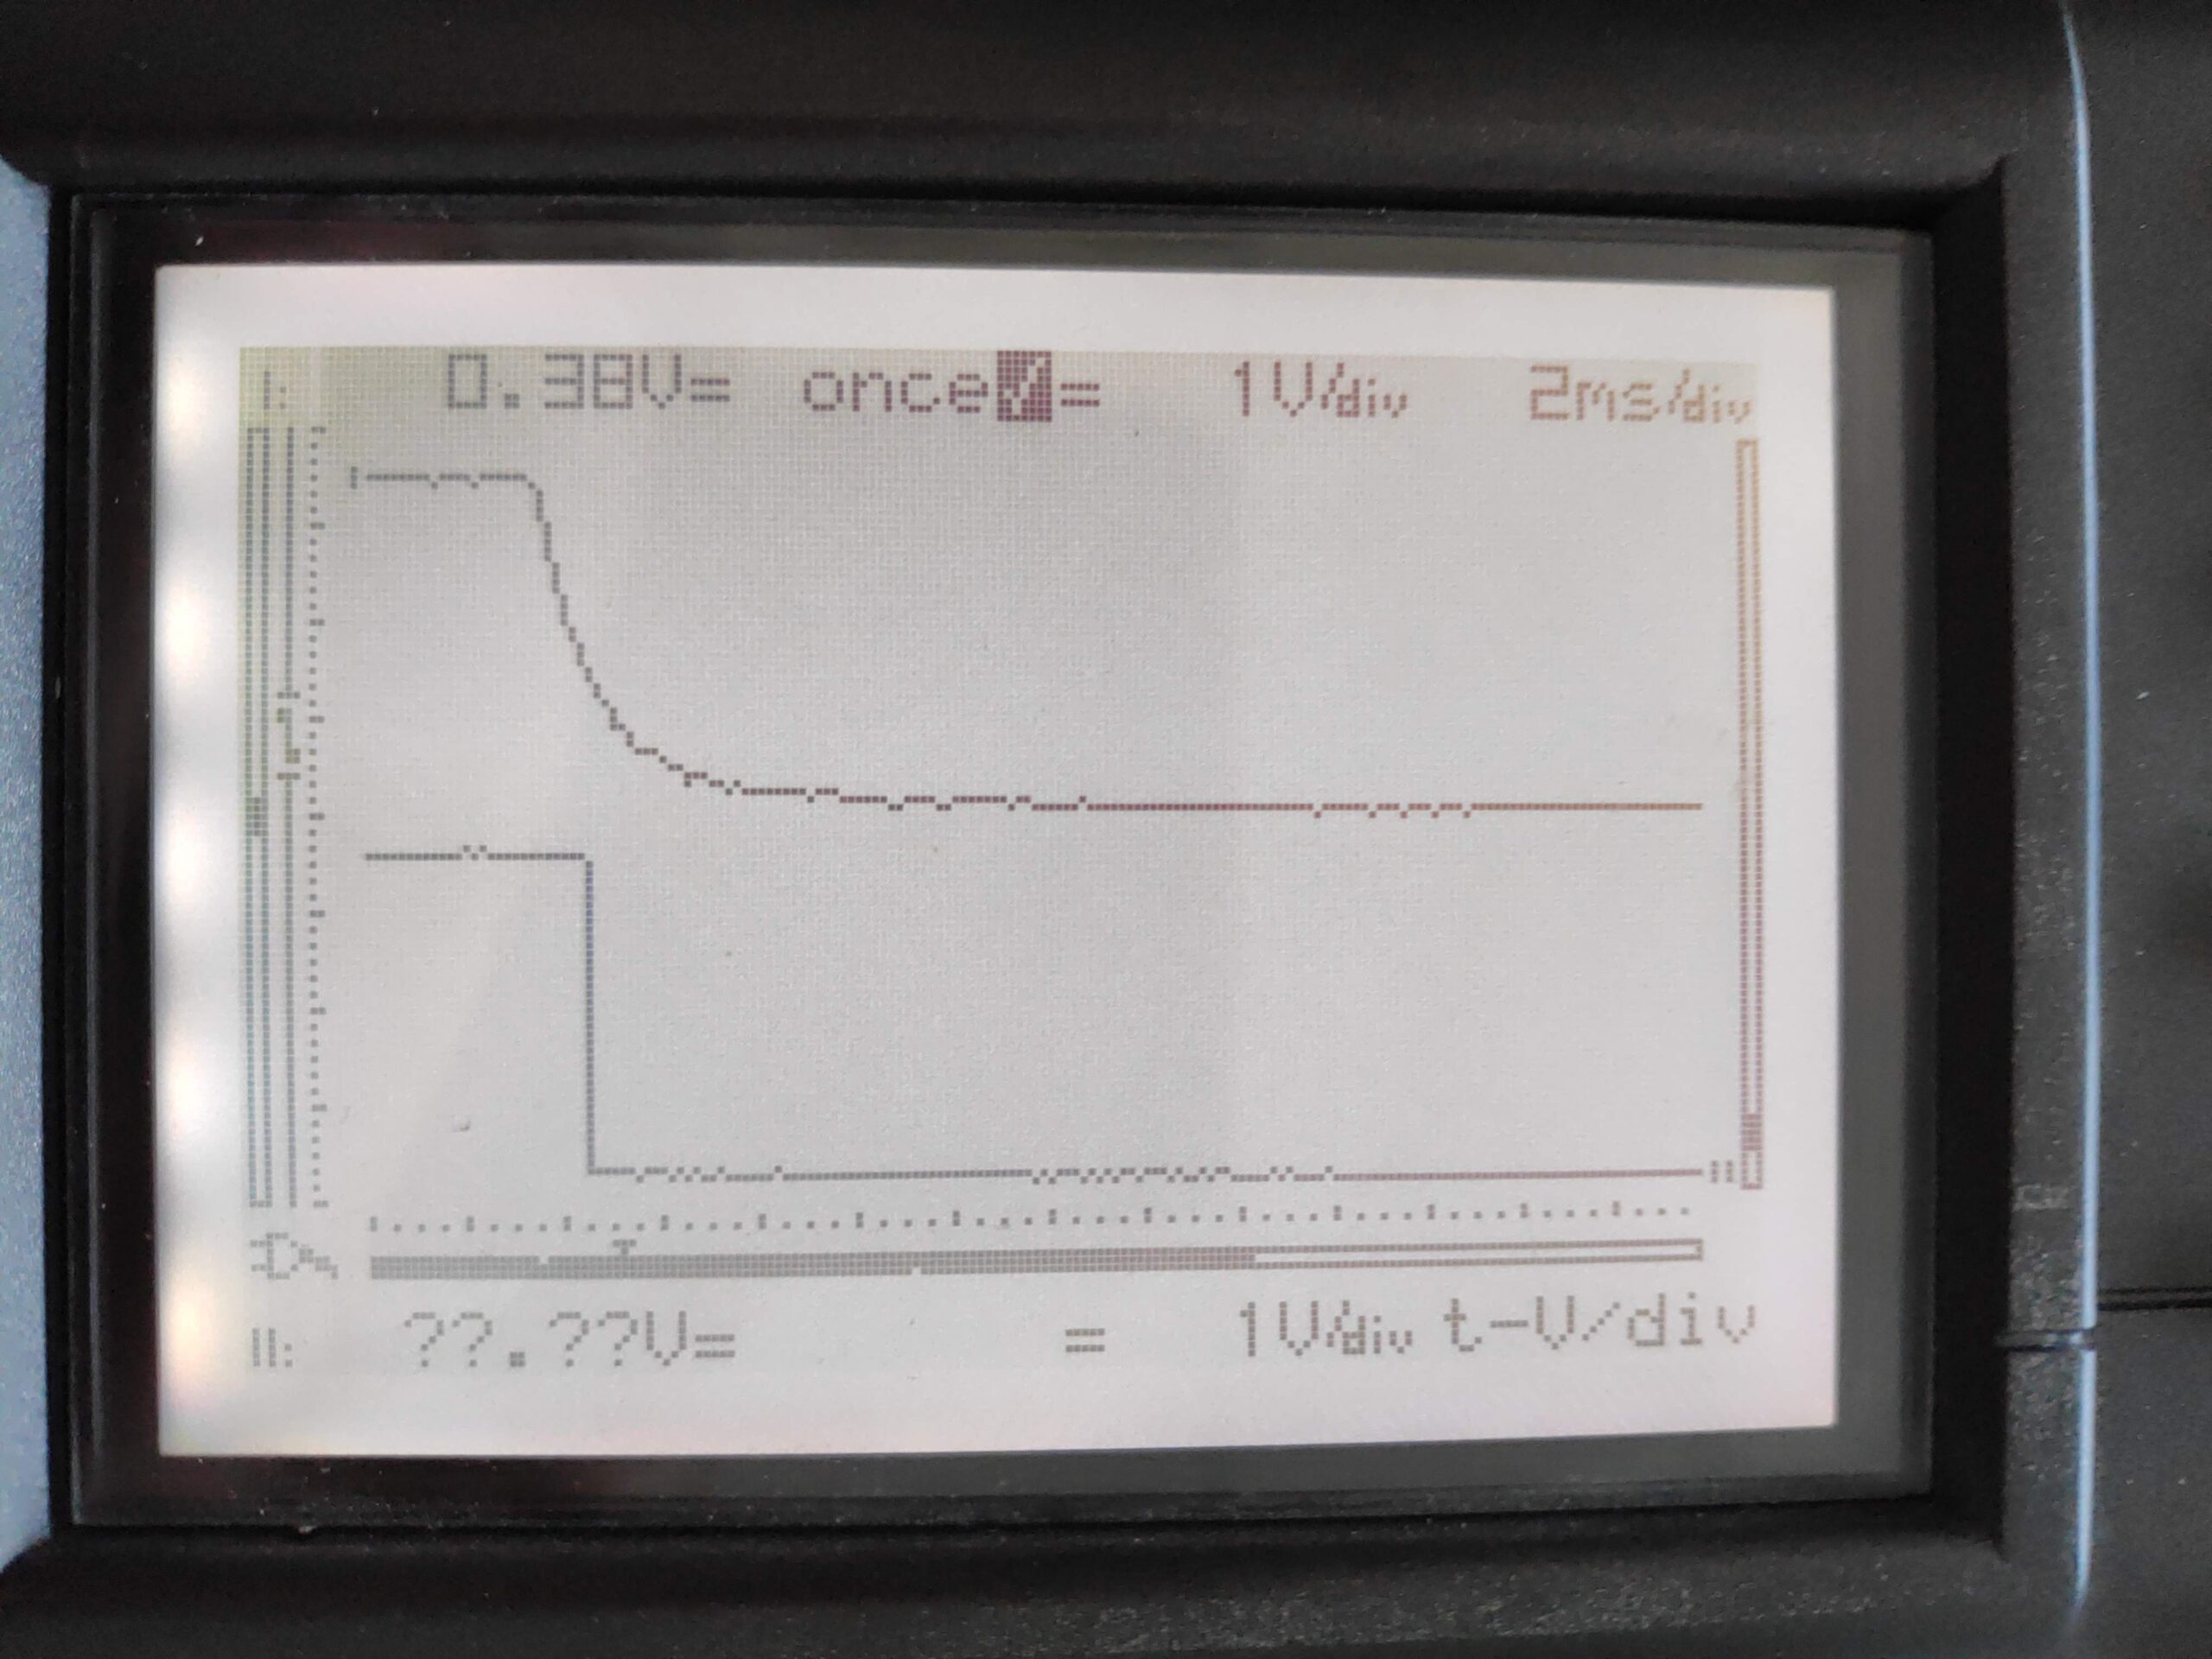
Now we see the signal measured after the second stage RC Low-pass filter and after the schmitt-trigger. As you can see the signal is very clean now and once it’s grounded, after a short period it is switched off suddenly.
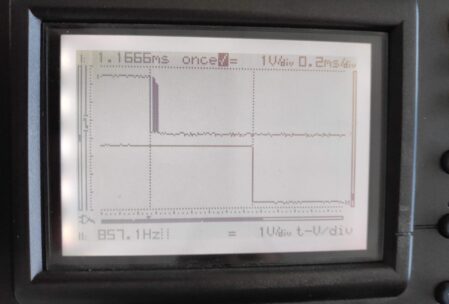
And here is the final comparison very zoomed in for the falling edge. We compare the raw input with the output of the second stage RC Low-pass filter and schmitt-triggered output.
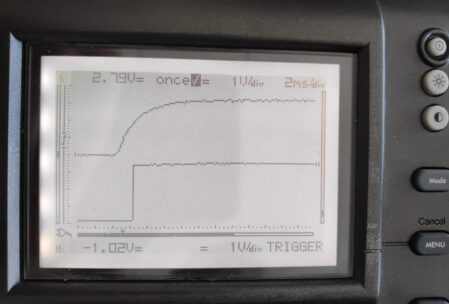
And at last here is an image of the rising edge after the second stage RC Low-pass filter and after the schmitt-trigger for completeness.
We are very satisfied with the setup of the windprobe, next time we will continue integrating more of the circuit to confirm the counters work like we planned them to work.
Github Link: https://github.com/TheCell/Weatherstation
Archives
- November 2023
- December 2022
- November 2022
- February 2022
- November 2021
- October 2021
- September 2021
- July 2021
- April 2021
- March 2021
- February 2021
- January 2021
- September 2020
- July 2020
- April 2020
- March 2020
- February 2020
- December 2019
- November 2019
- October 2019
- August 2019
- June 2019
- February 2019
- December 2018
- November 2018
- October 2018
- September 2018
- August 2018
- July 2018
- May 2018
- March 2018
- February 2018
- December 2017
- November 2017
- September 2017
- July 2017
- June 2017
- April 2017
- February 2017
- January 2017
- October 2016
- September 2016
- July 2016
- May 2016
- April 2016
- March 2016
- August 2015
- July 2015
- May 2015
- April 2015
- March 2015
- February 2015
- January 2015
- October 2014
- April 2014
- March 2014
- February 2014

